Replacing brake pads saves money and keeps your car safe. Best of all, it is something you can do yourself! Follow this guide to replace your brake pads like a pro.
Tools and Supplies Needed
- Jack and jack stands
- Lug wrench or impact wrench
- Socket set and ratchet
- C-clamp or brake caliper tool
- Brake grease
- New brake pads
- Brake cleaner
- Torque wrench
Step 1: Park and Secure the Vehicle
Park on a level surface and engage the parking brake. Place wheel chocks behind the rear wheels.
Step 2: Loosen the Lug Nuts
Loosen the lug nuts before lifting the vehicle. Do not remove them yet.
Step 3: Lift the Car and Remove the Wheel
Use a jack to lift the car. Secure it with jack stands before removing the wheel.
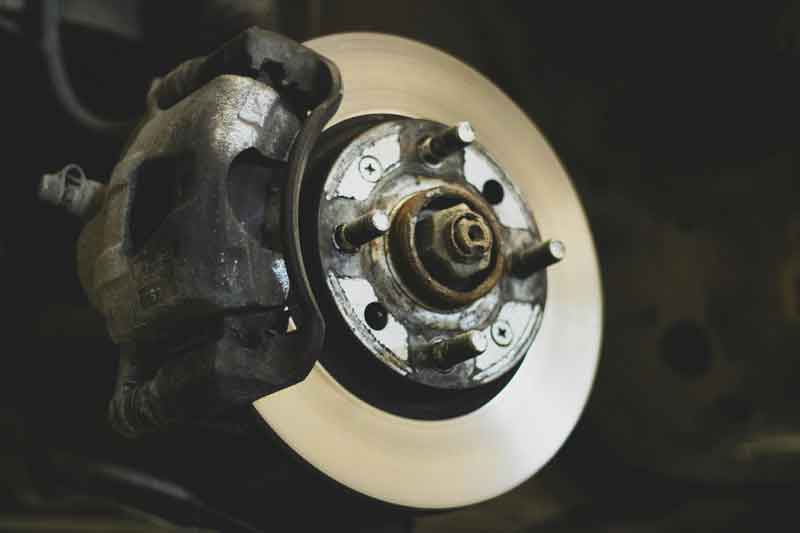
Step 4: Remove the Brake Caliper
Use a socket to remove the caliper bolts. Slide the caliper off carefully. Do not let it hang by the brake line.
Step 5: Remove the Old Brake Pads
Slide out the worn brake pads. Check for uneven wear or damage.
Step 6: Compress the Brake Piston
Use a C-clamp or brake caliper tool to push the piston back into the caliper.
Step 7: Install the New Brake Pads
Apply brake grease to the back of the pads. Slide them into place.
Step 8: Reinstall the Brake Caliper
Position the caliper over the new pads. Tighten the caliper bolts to the manufacturer’s torque specifications.
Step 9: Reinstall the Wheel and Lower the Car
Put the wheel back on and hand-tighten the lug nuts. Lower the car before fully tightening them with a torque wrench.
Step 10: Pump the Brake Pedal and Test Drive
Pump the brake pedal to seat the pads. Take a slow test drive to ensure proper braking.
Final Tips:
- Always replace brake pads in pairs (both front or both rear).
- Check your brake fluid level after replacing pads.
- If you hear grinding or squealing, inspect the brakes again.
Replacing brake pads takes about an hour. Follow these steps for a smooth, safe ride. Want top-quality brake pads? Shop Now at TireHardware.com